Self-Register in WebDMC
Self-Register in WebDMC
How to register and pay
STEP 1: Once you’re logged into WebDMC, go to the Academics tab on the left and select “Search for Sections.”
(click to enlarge)

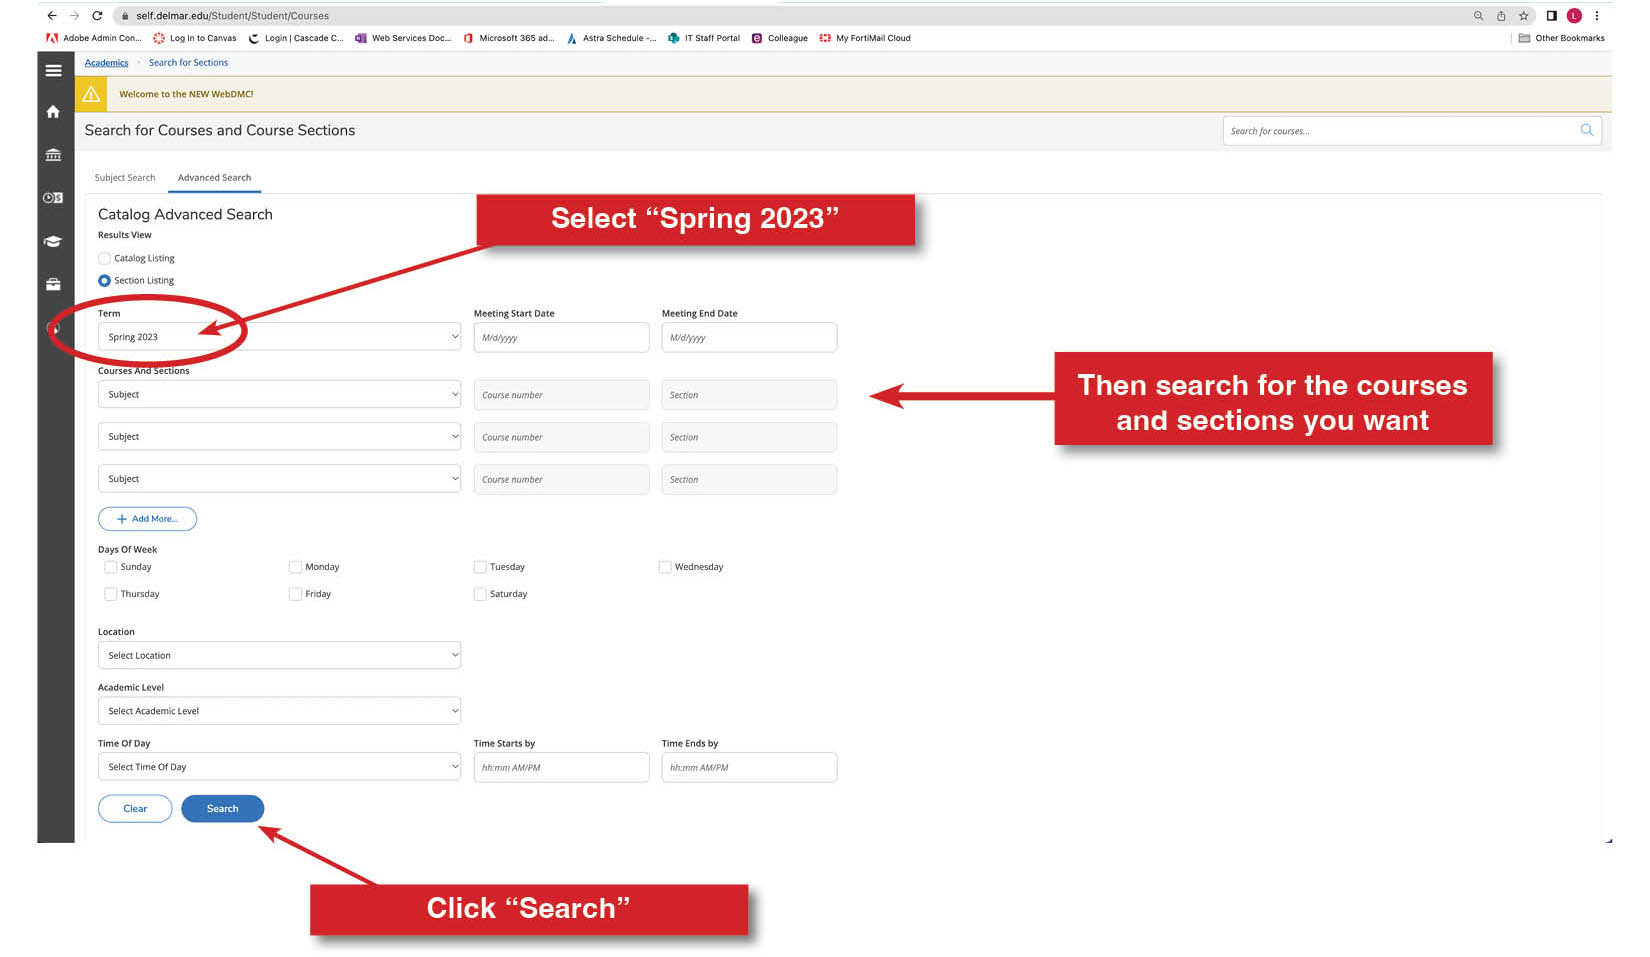
STEP 2: Under Term, select "Spring 2023." Then you can enter the courses and sections you want and click "Search."
(click to enlarge)
STEP 3: When you find a course you want, click the blue "Add" button.
(click to enlarge)

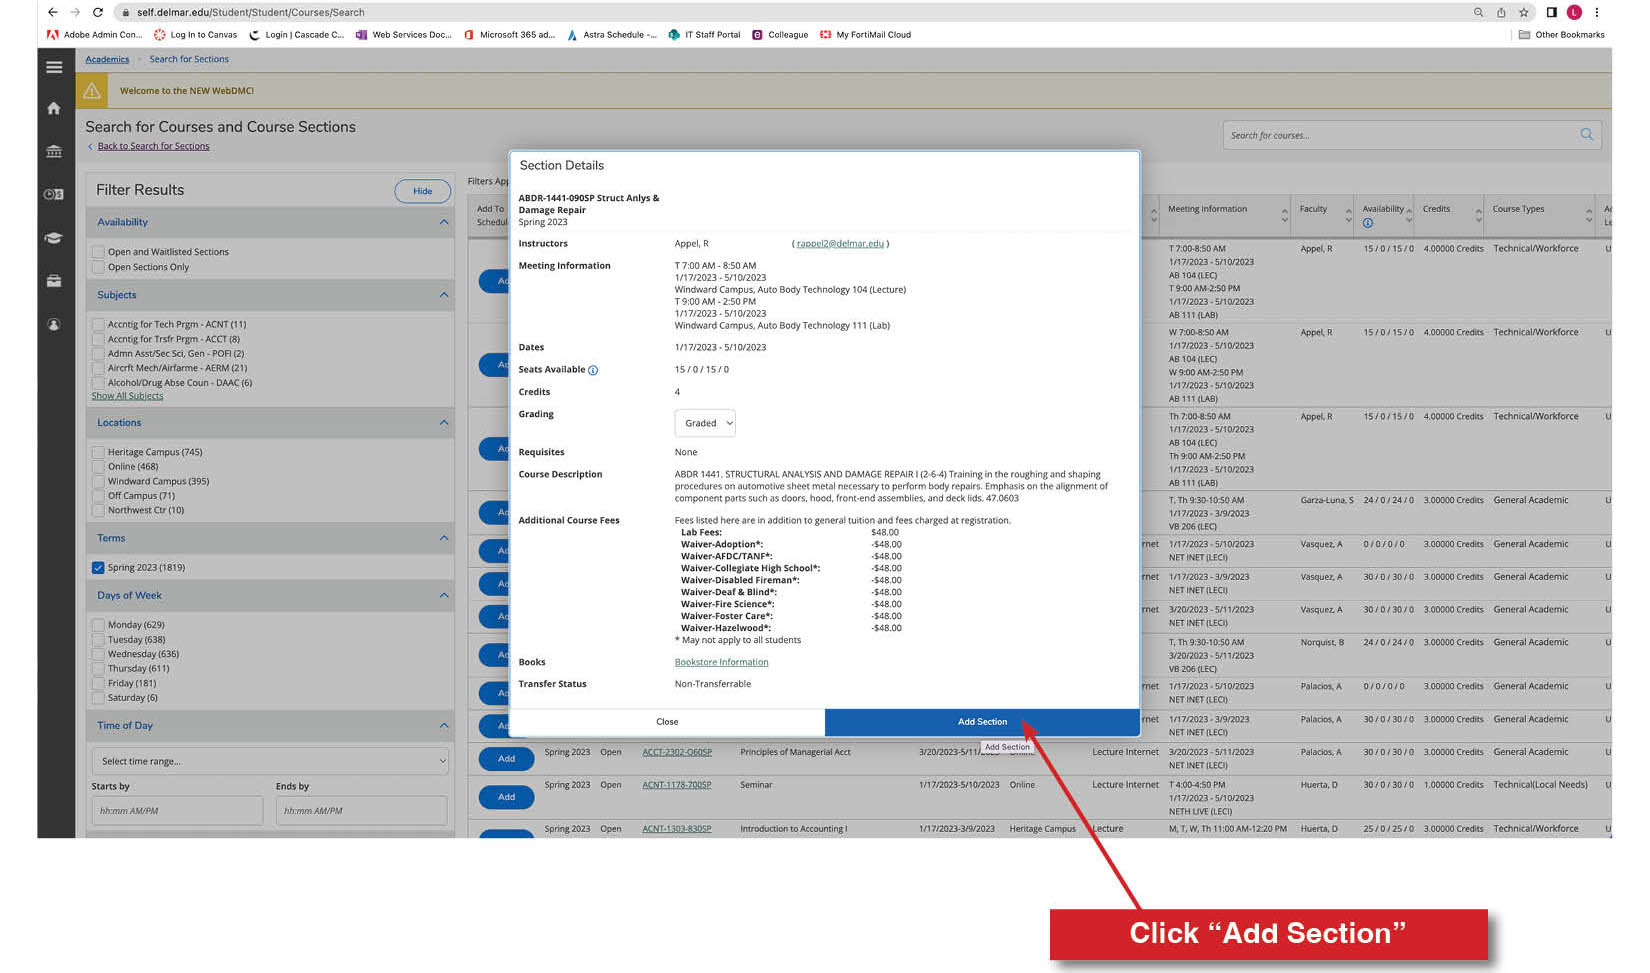
STEP 4: On the popup screen, click "Add Section."
(click to enlarge)
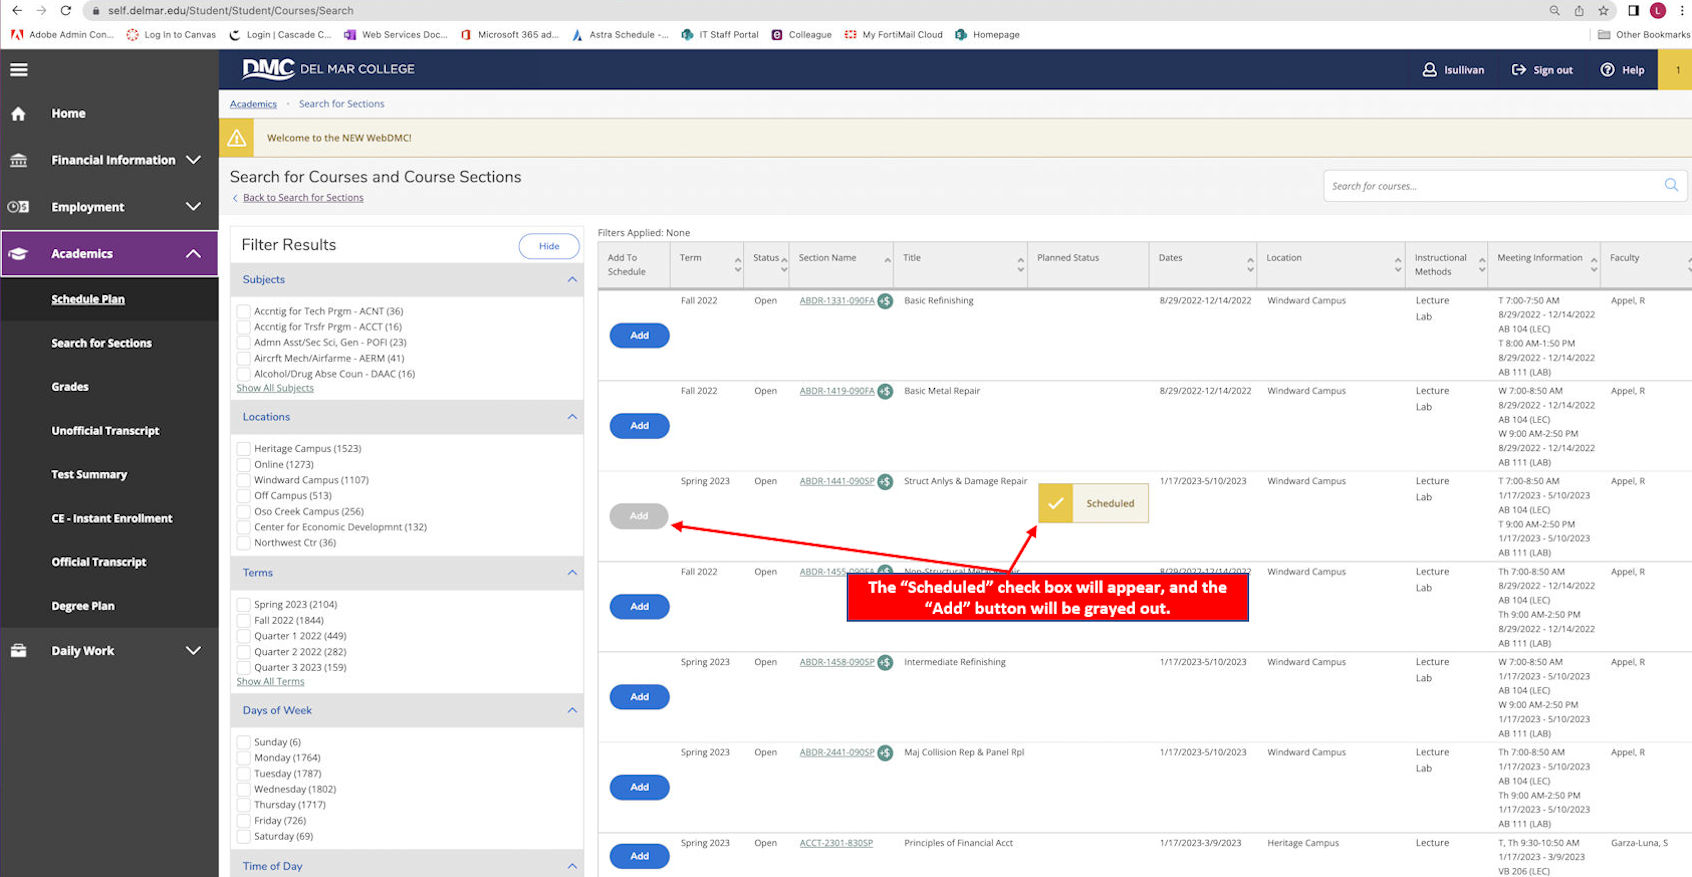
STEP 5: The "Scheduled" check box will appear on the screen, and the "Add" button will be grayed out.
(click to enlarge)
STEP 6: Under the Academics tab on the left, click "Schedule Plan."
(click to enlarge)

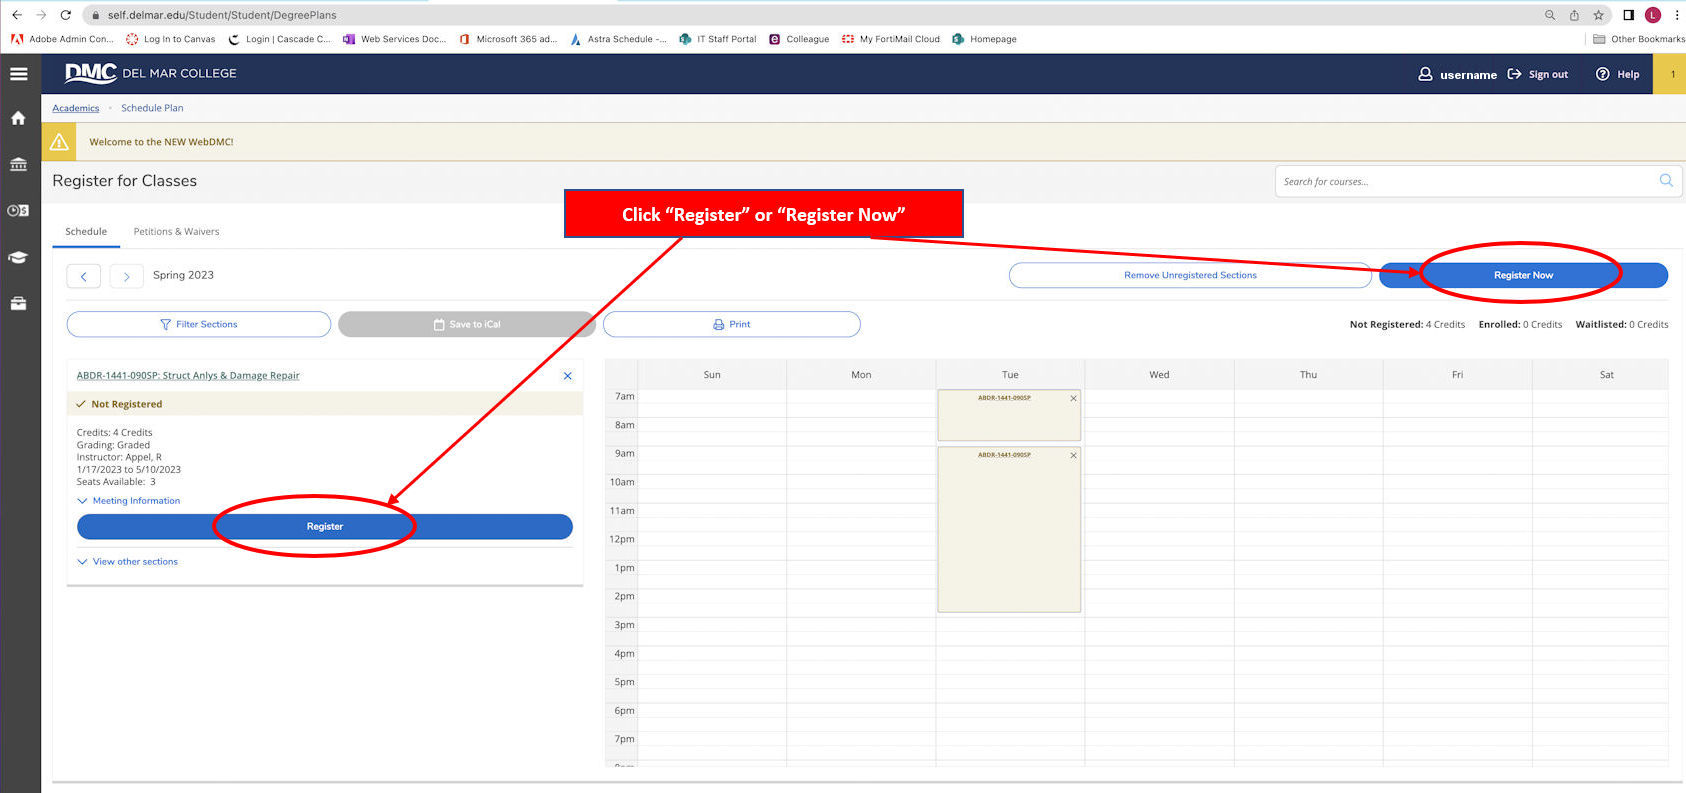
STEP 7: The following screen will appear, and you can click on "Register" on the left, or on "Register Now" at the far right.
(click to enlarge)
STEP 8: Under the "Financial Information" tab on the left, click on "Viking Pay." A payment window will open.
(click to enlarge)

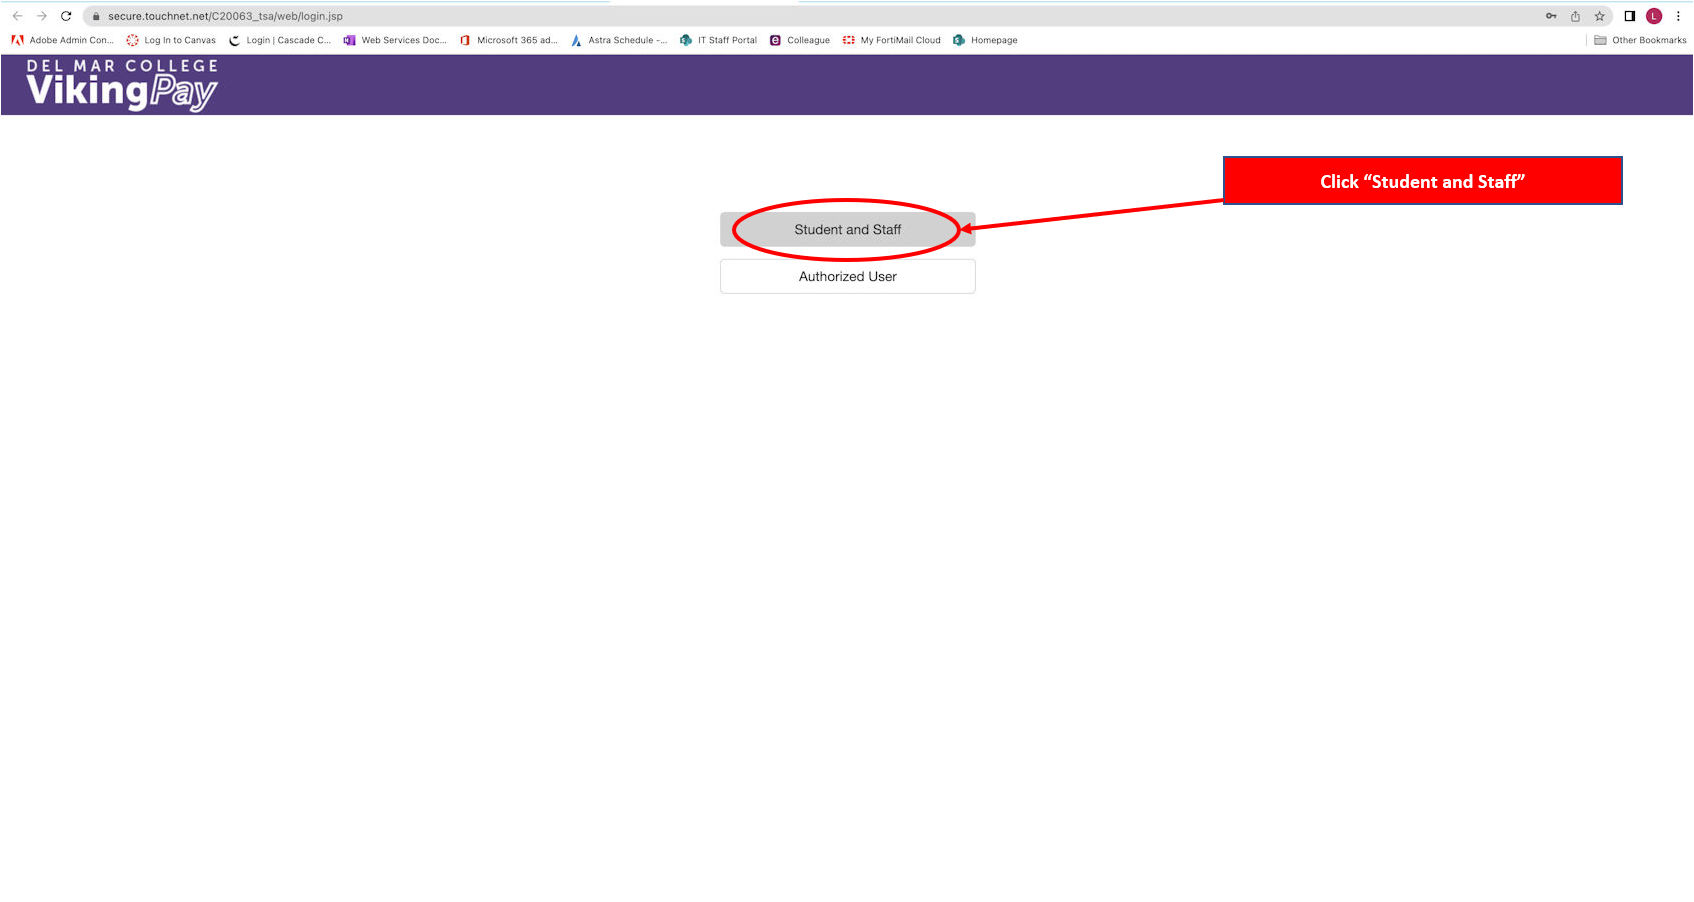
STEP 9: In the "Viking Pay" window click on "Student and Staff."
(click to enlarge)
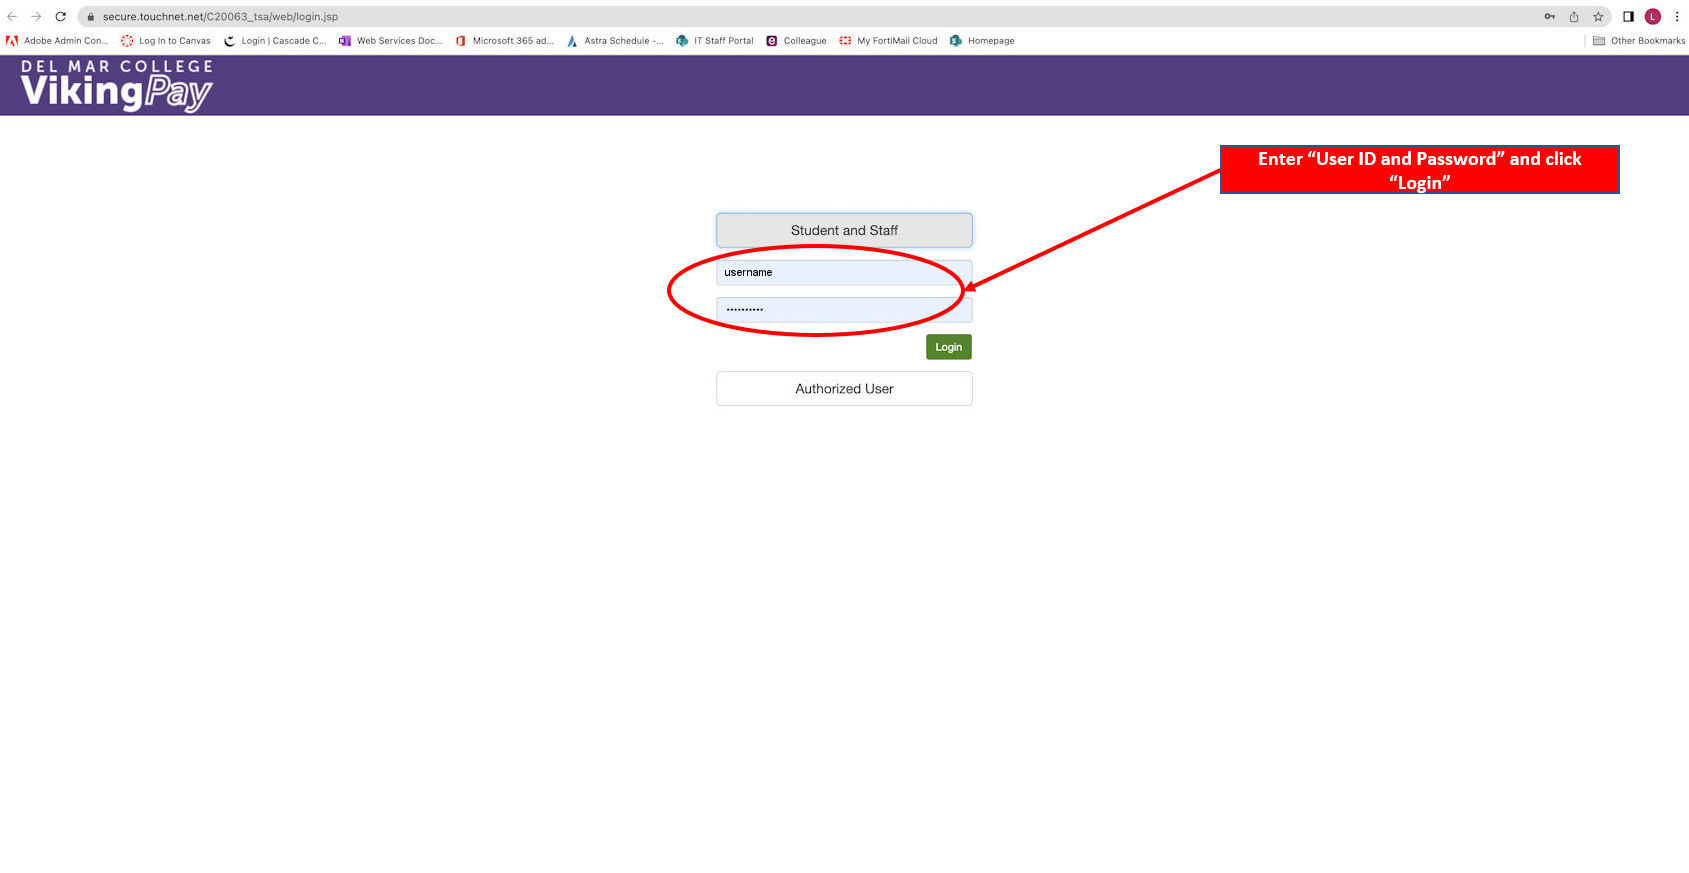
STEP 10: Enter your username and password on the next screen and click "Login." Follow the instructions to pay.
(click to enlarge)
Page last updated January 5, 2026.